It’s exactly what it sounds like it is. A sticker sheet is a large sheet of paper with multiple sticker designs on a single sheet. The cool thing about sticker sheets is they are incredibly customizable, from choosing the stickers on the sheet and their size and shape to the sheet size itself. The sticker sheet is your oyster; make it what you want! Today, we will be giving you a tutorial on one of three methods on how to make your own sticker sheet.
What you need to know
How to create a Standard Sticker Sheet
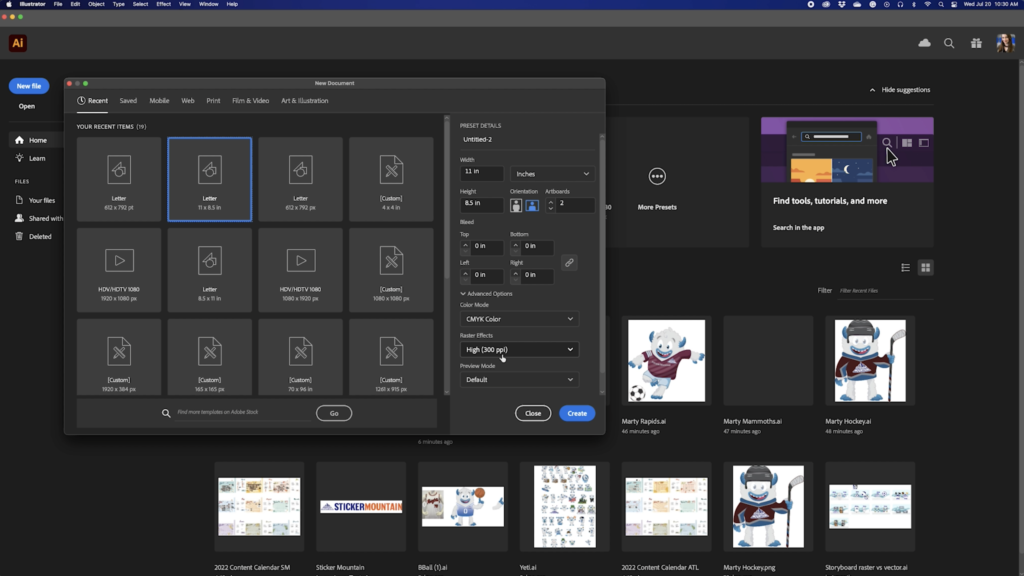
Step 1: Open your artwork in Adobe Illustrator
We are creating a new document the size of a sheet of paper.
Hit Landscape orientation so the file is 8.5″ tall and 11″ wide
Settings must be in CMYK color mode to ensure accuracy between the colors on the computer and the printed colors.
Raster effects are set to the highest at 300 ppi, allowing for high-quality printed images.
Press Create
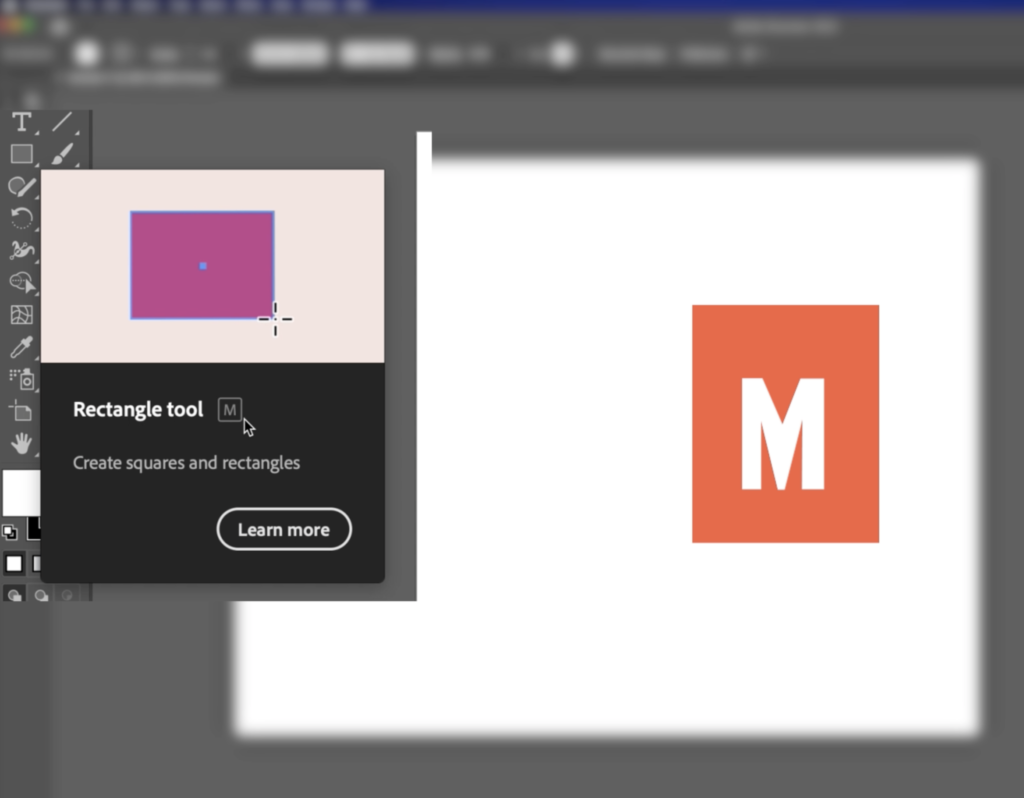
Step Two: Create a Rectangle
The new document will be the central hub for your stickers rather than the artboard itself. Now, to create a rectangle. To do this:
Select the Rectangle Tool on the left side of the screen. Or press M for the keyboard shortcut.
Then click and drag from the top left corner of your artboard to the bottom right corner.
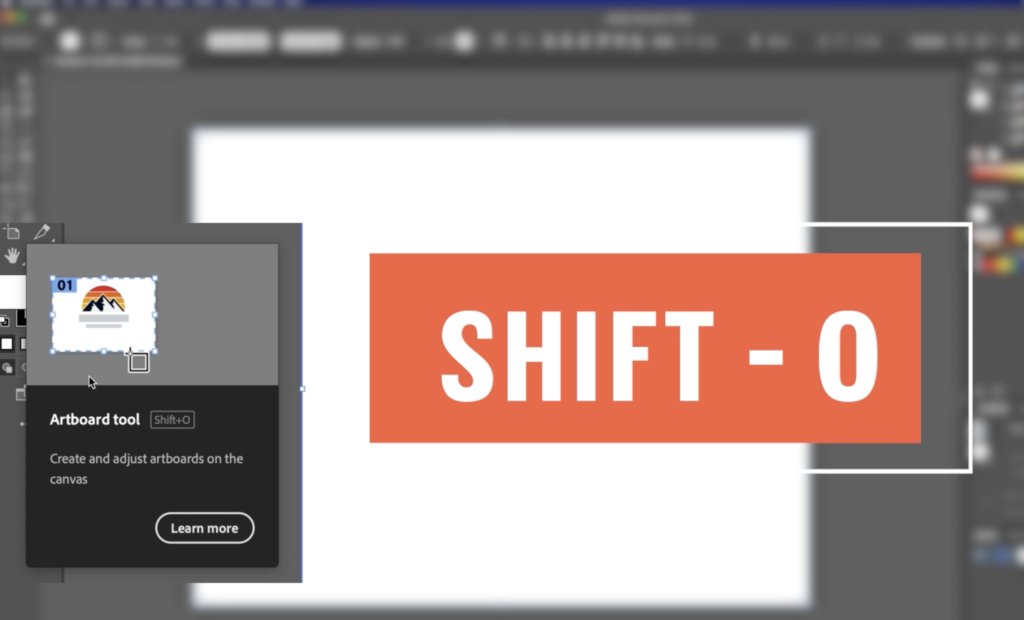
You will need to expand your artboard by .5″ on each side.
Click the artboard tool from the tools selection on the left side of the screen or SHIFT- O for the keyboard shortcut.
Next, go to the dimensions at the top of the screen and type 11.5″ for width and 9″ for height.
Double-click on the empty space to exit back to your artboard.
Bonus! Create curved corners for your sticker sheet
If you want to give your sticker sheet curved corners:
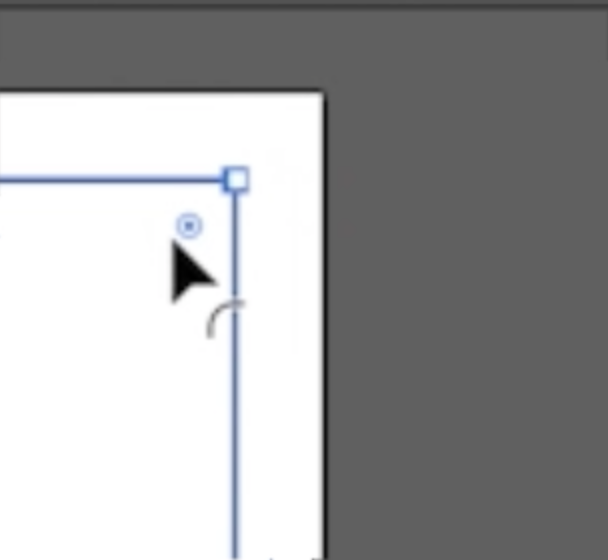
Clicking on your rectangle, you will see little circles in the corners
Double-click the circle.
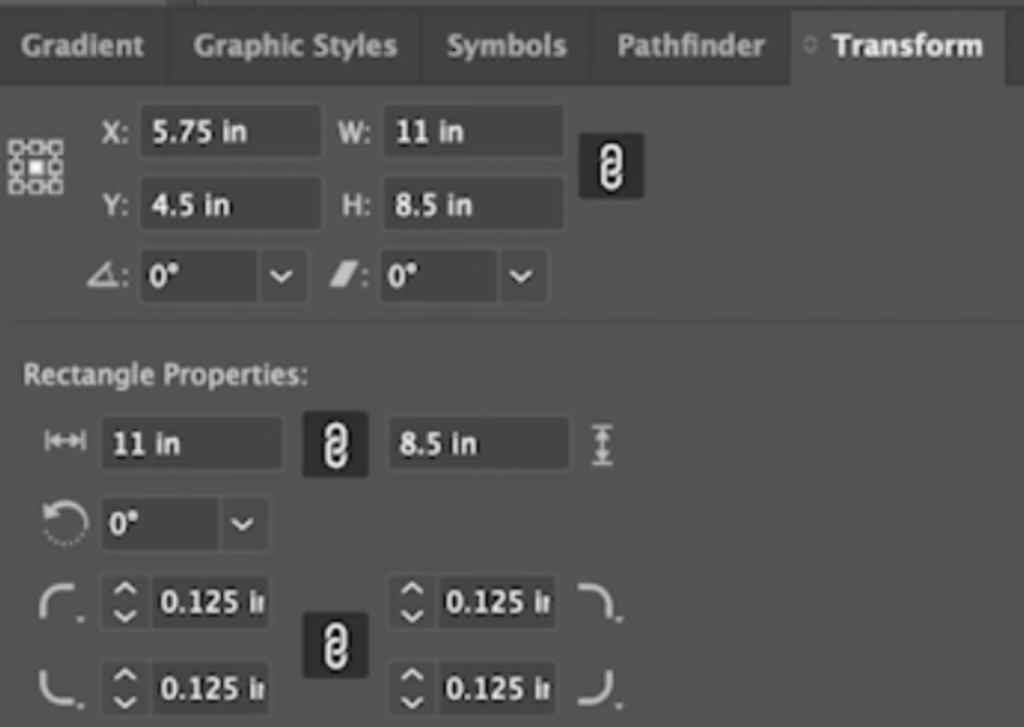
The Transform Panel will pop up on the lower right-hand side of the screen.
Under Rectangle Properties, go to the corner section and make sure they are all locked and linked together.
In one of the boxes, type 0.125
Now you have curved corners!
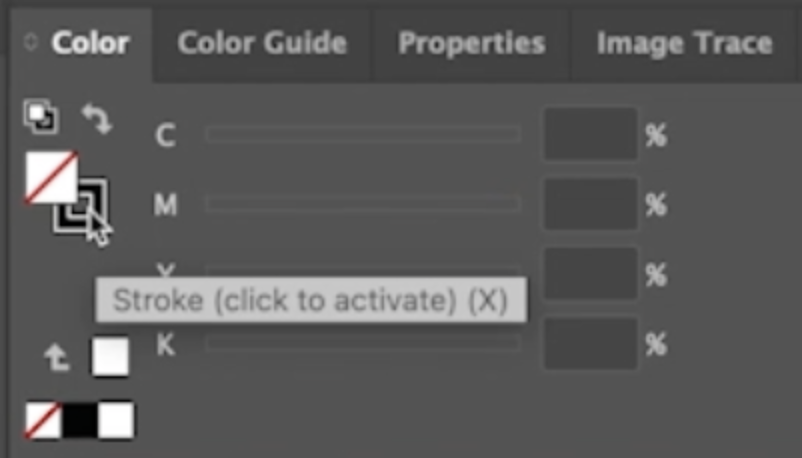
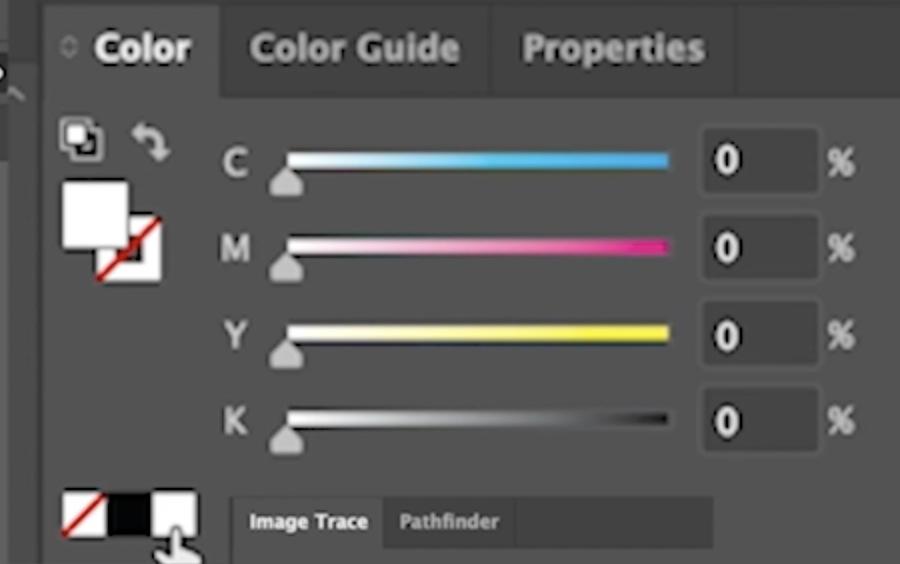
Last but not least, go to the color panel on the top left side
Switch your fill to OFF by clicking the square with the red line through it.
Finally, click on your stroke and change it toa bright color, like red.
You now have a rectangle!
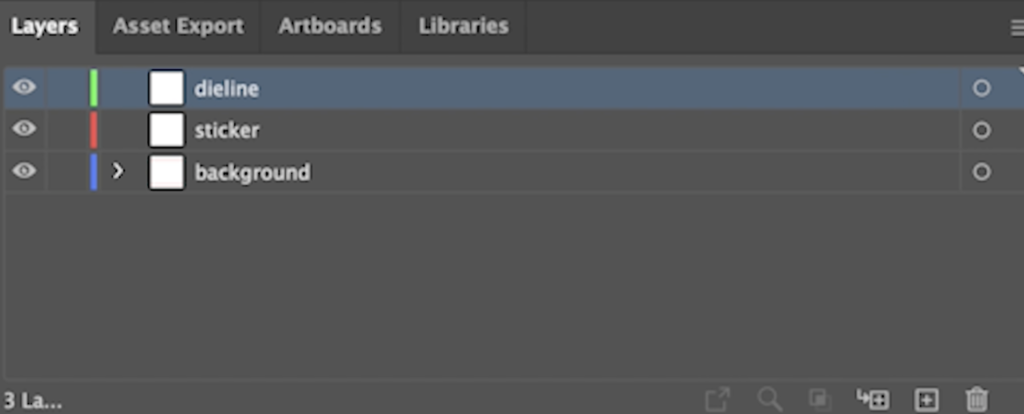
Step Three: Create Individual Layers
This step is significant for organizational purposes and good habits but is also optional. Just like Ogres and onions, our sticker sheets have layers! For this example:
Go to the bottom right side of the screen and press Layers.
Name this current layer background.
Click the Plus button on the bottom and add two more layers.
Double-click on the name, change one to stickers and the other die-lines.
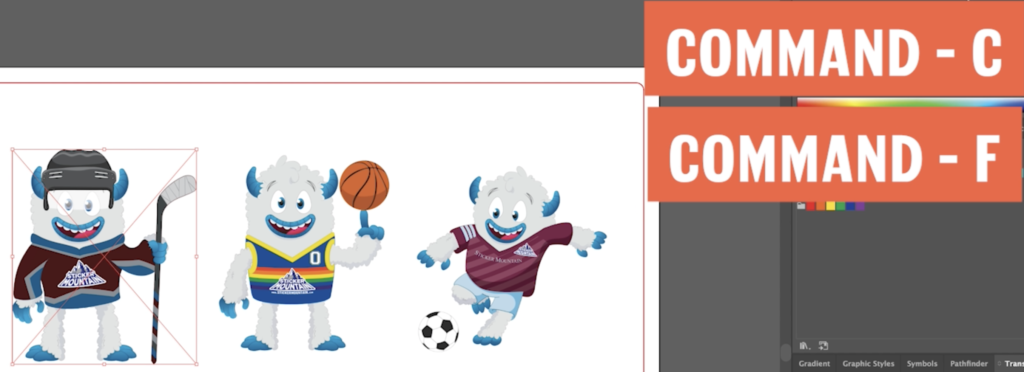
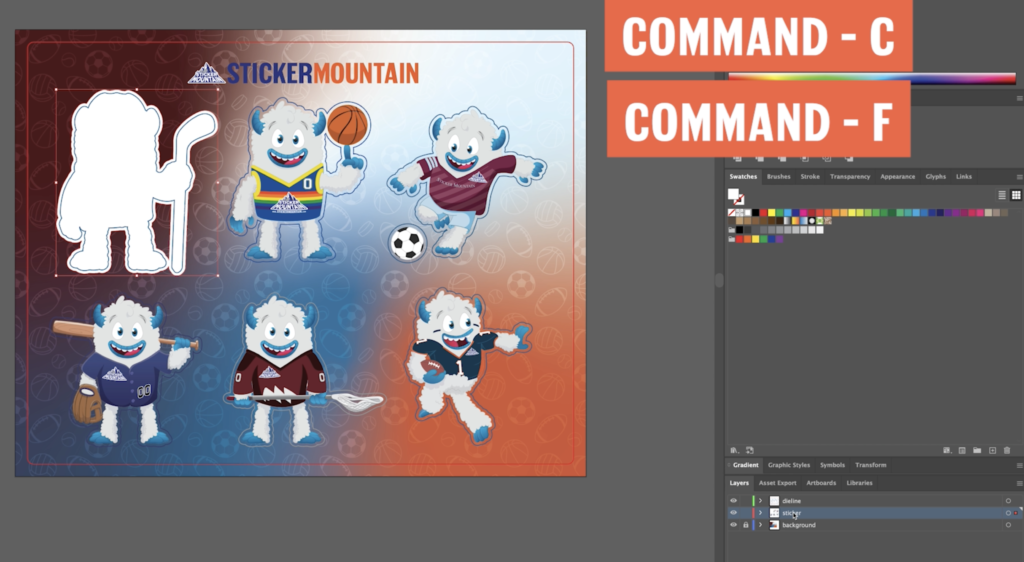
Then, copy the rectangle with COMMAND-C.
Paste it into the die-line layer with COMMAND-F (this makes it easier for the laser printer and the artist to handle your artwork).
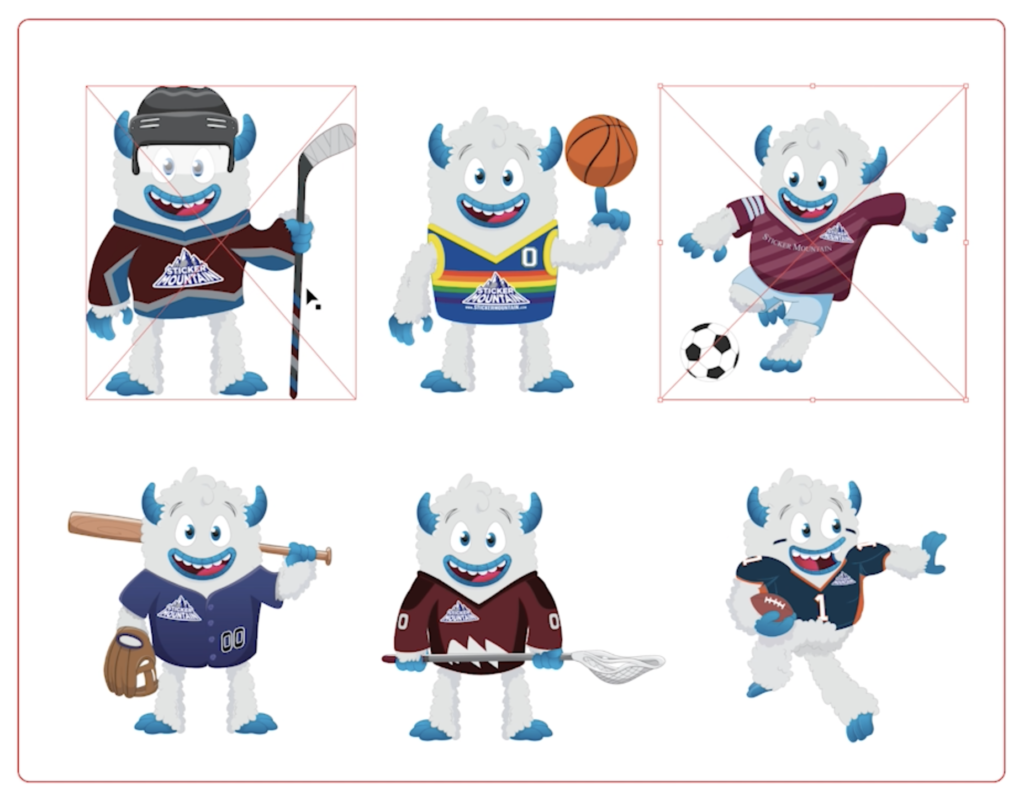
Step Four: Add Artwork
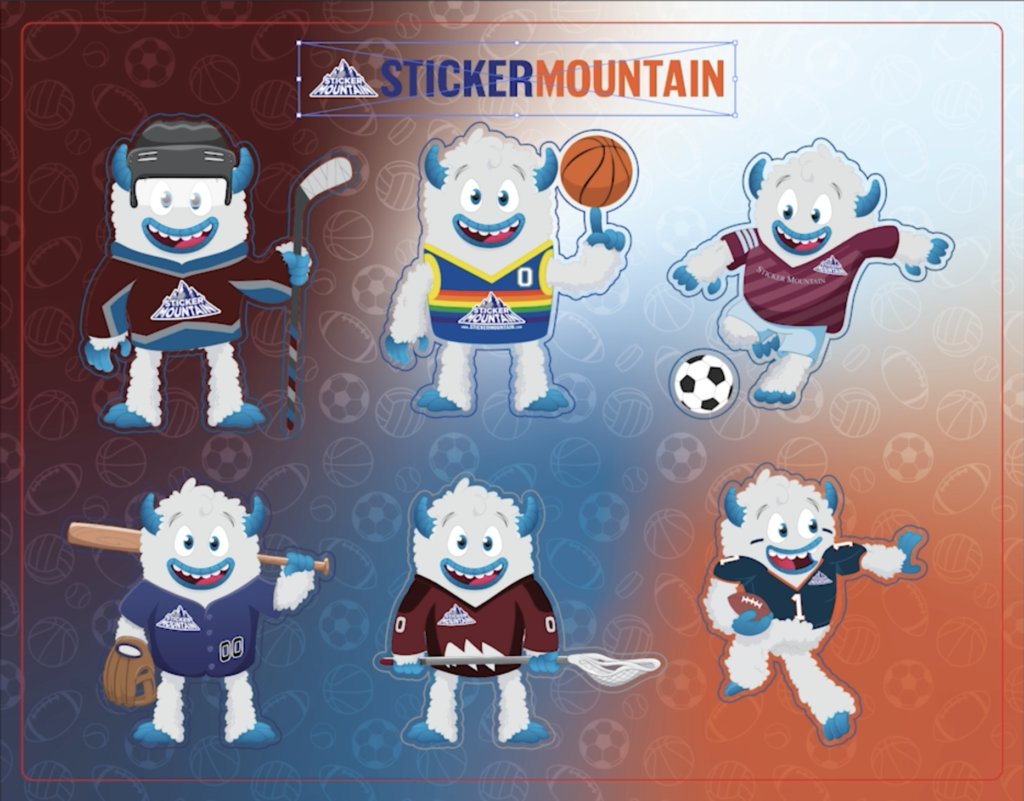
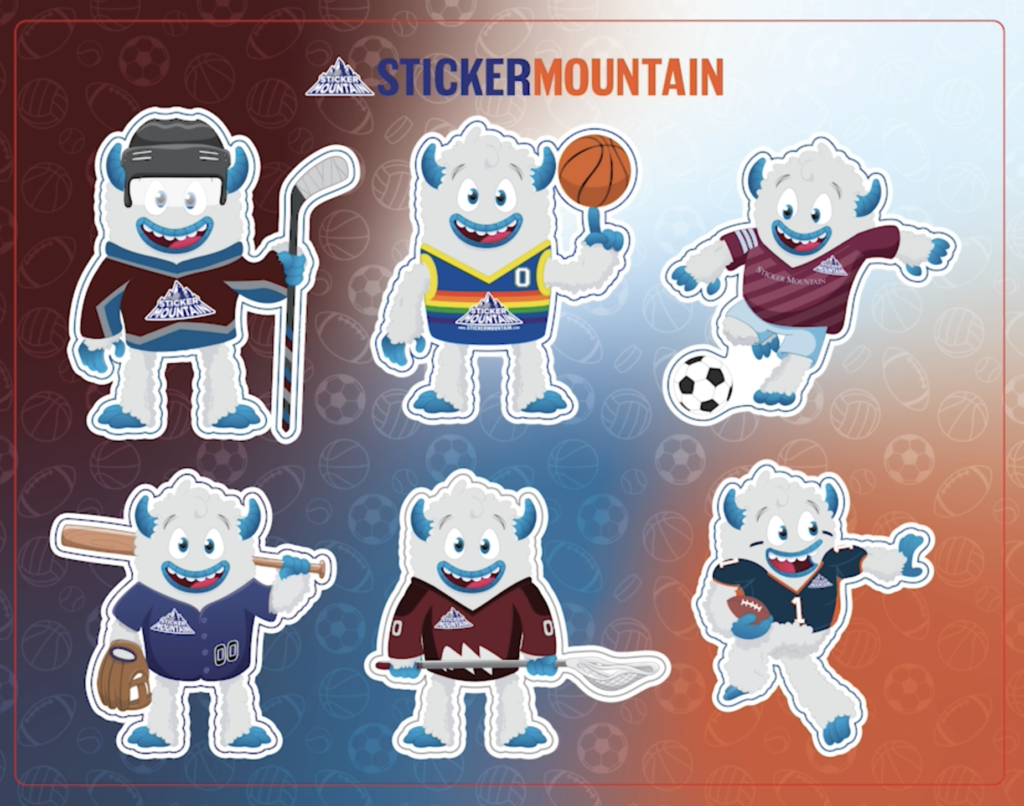
At this time, for example, we will be adding six Sticker Mountain Marty’s representing our Colorado team sports. This step is exciting; let your creative juices flow!
First, arrange them so you have enough space between each sticker
If the PNGs come in too big, change the dimensions.
Do so by making each sticker 3.5″ tall or any size you’d like.
Make sure to lock your dimensions so the images do not skew or warp.
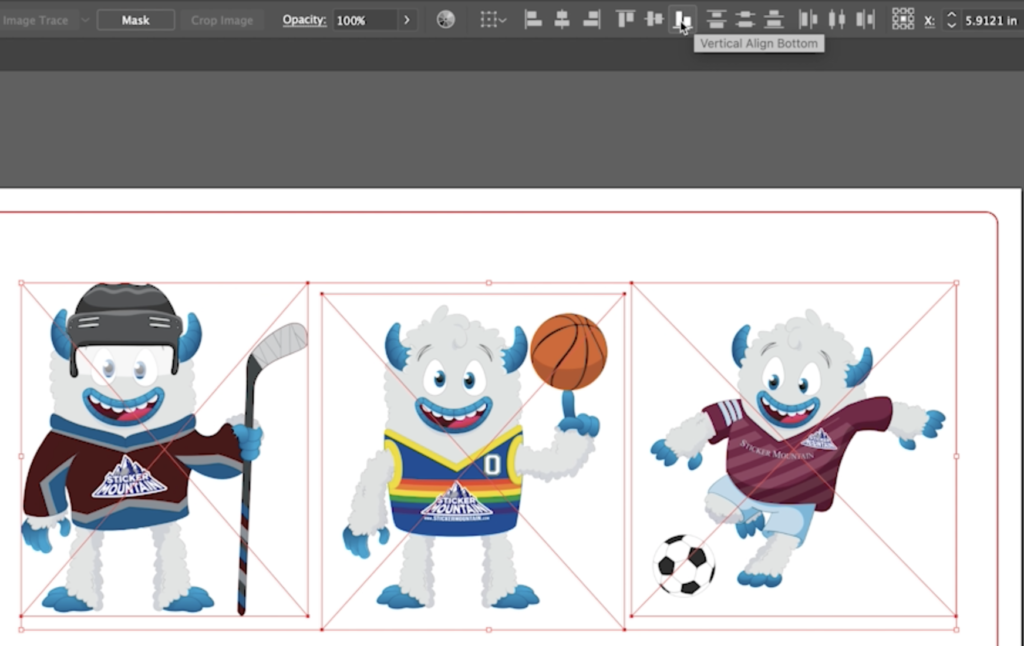
With three of the stickers selected, click the vertical align button at the top center of the page, allowing the images to be on one plane.
Your artwork is now on your sticker sheet!
Step Five: Create the Die-Lines for Each Sticker
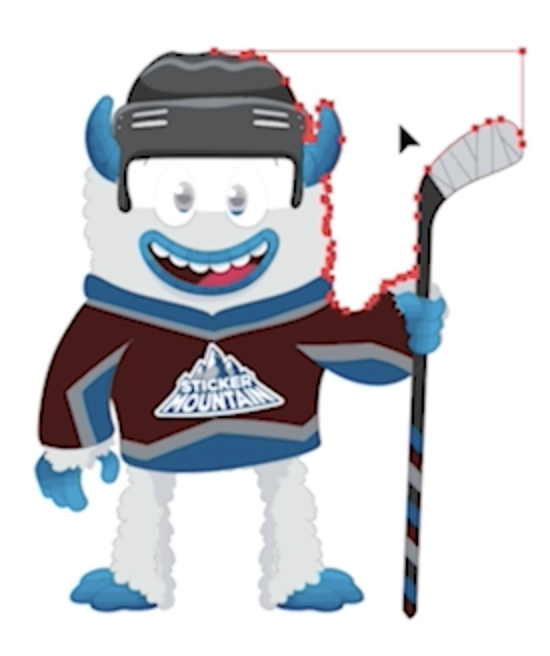
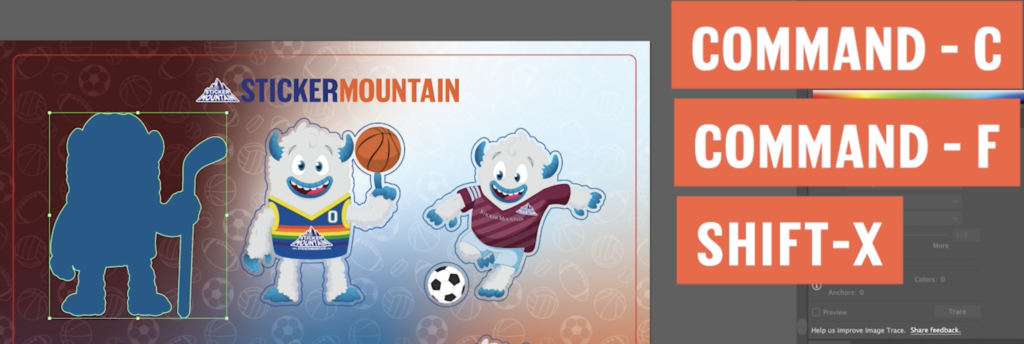
Begin by selecting one of your stickers. In this case, it will be hockey Marty.
Copy and Paste in front with the keyboard shortcuts COMMAND+C and COMMAND+F.
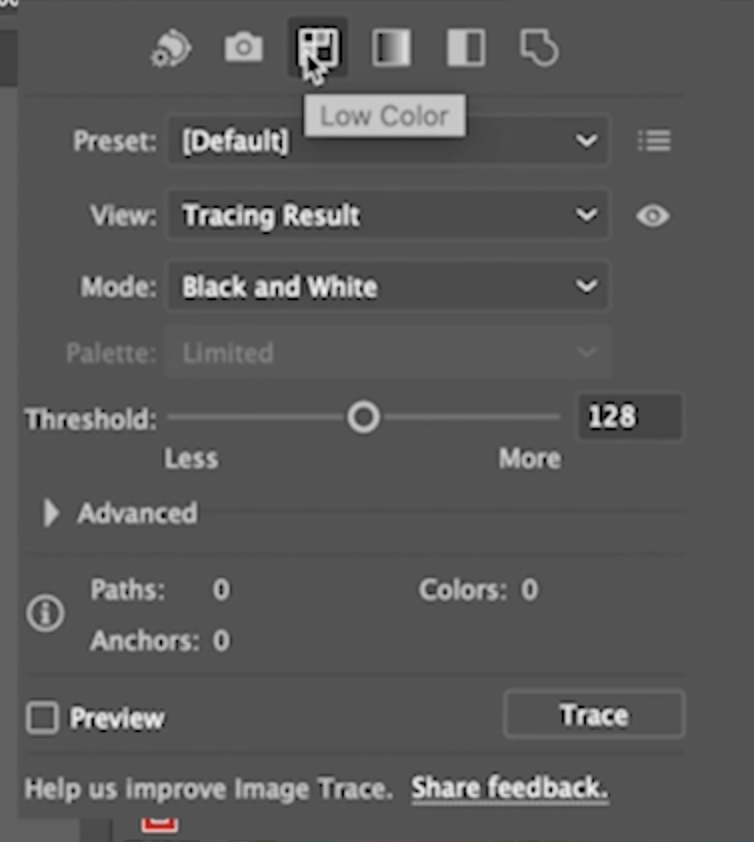
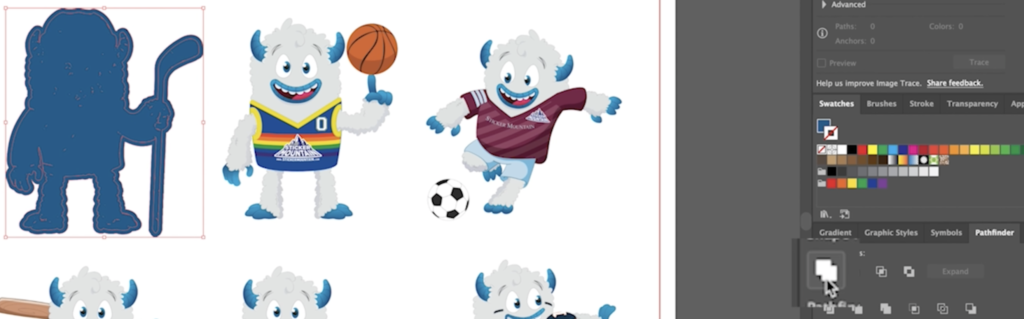
With the image selected, we are going to image trace
Go to Window, select Image Trace
Select the Low Color option
It may give you a message regarding loading time
Press OK
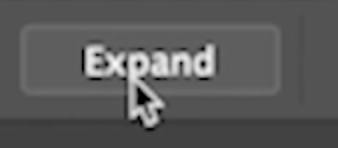
IMPORTANT, once the image is loaded, with the image still selected, go to the top toolbar and click expand; this will turn your object into a vector image.
Click off your object, then double-click it again (it goes into isolation mode)
Click and delete all the blank white backgrounds around the image (white backgrounds make it more challenging to create die-lines).
Double-click outside your artwork to exit isolation mode.
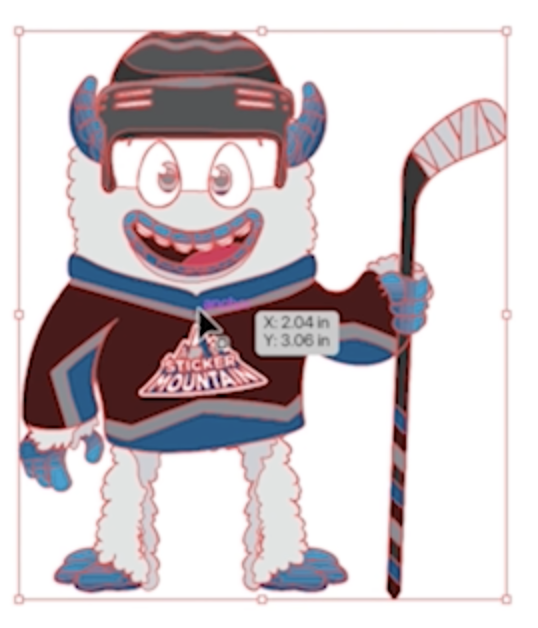
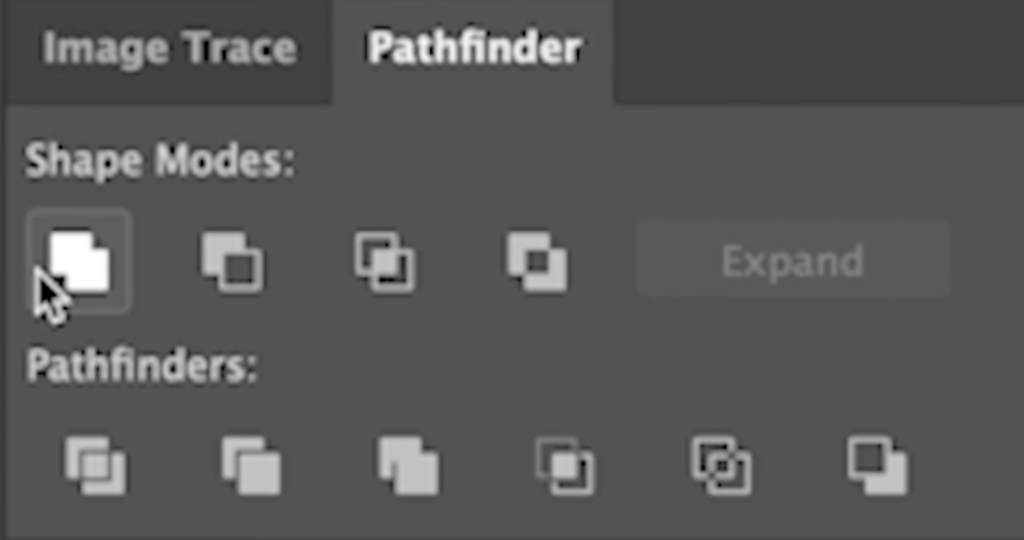
Select all of your art again.
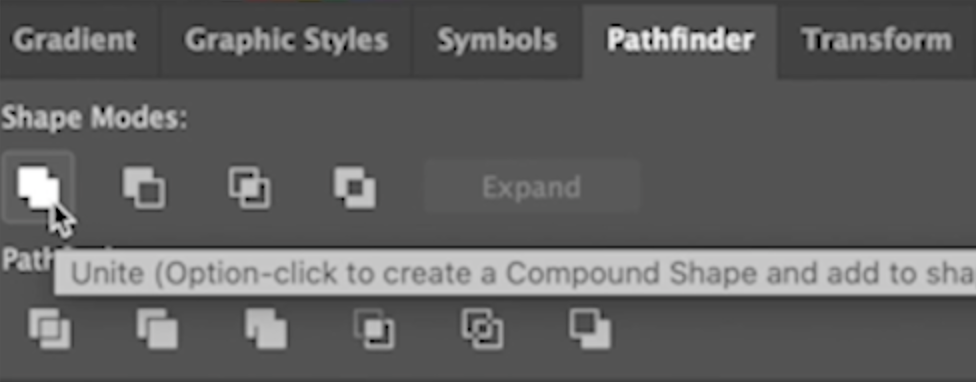
Open the Pathfinder window and click Unite.
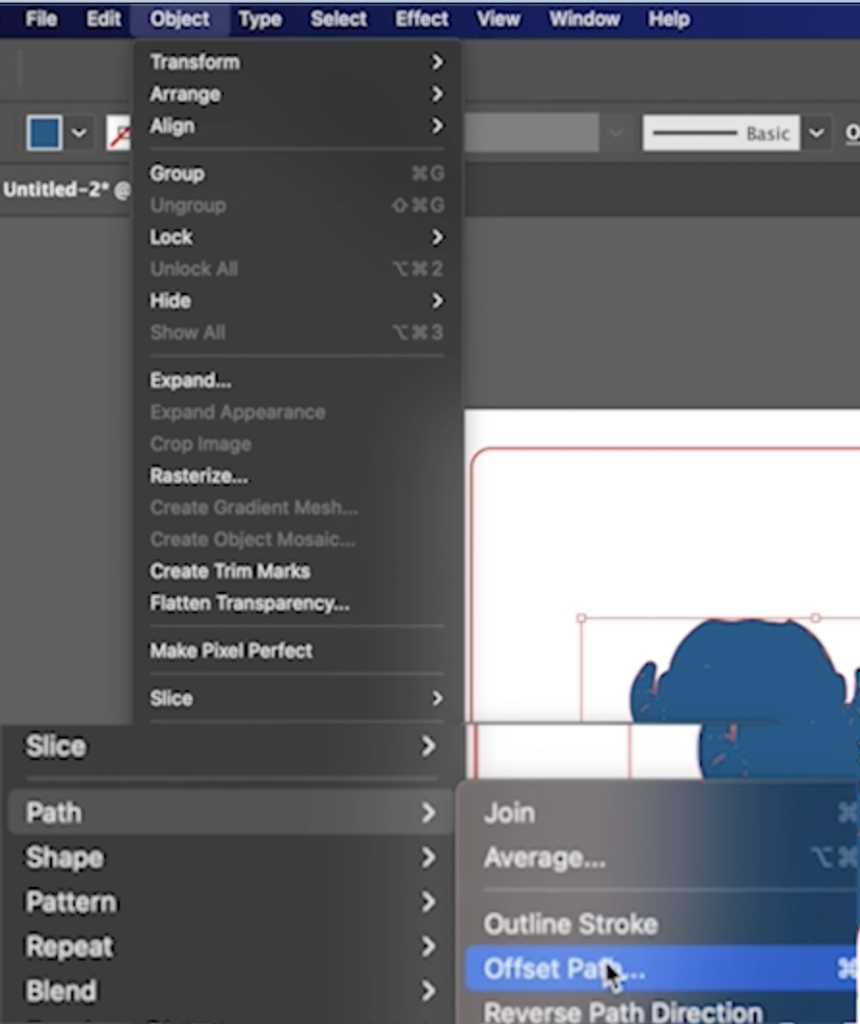
With your image still selected, go to the Object dropdown.
Find Path and then click Offset Path.
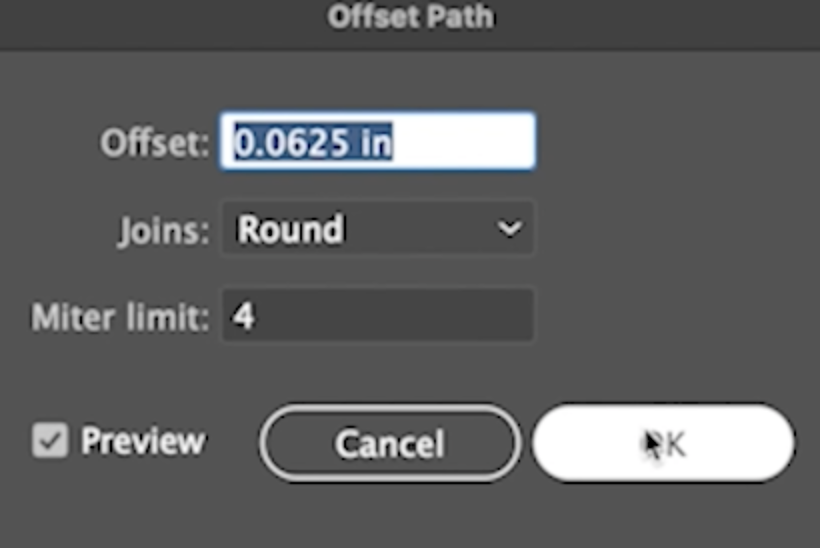
This opens a dialog box of how much we want to offset the Path.
For this example, we will put 0.0625 inches for the offset, with Joins being Round and the Limit to 4.
Press OK
Next, ensure everything is selected again, go back to the pathfinder panel, and choose Unite.
Unite is used to make sure there are no extra paths and it is one solid outline.
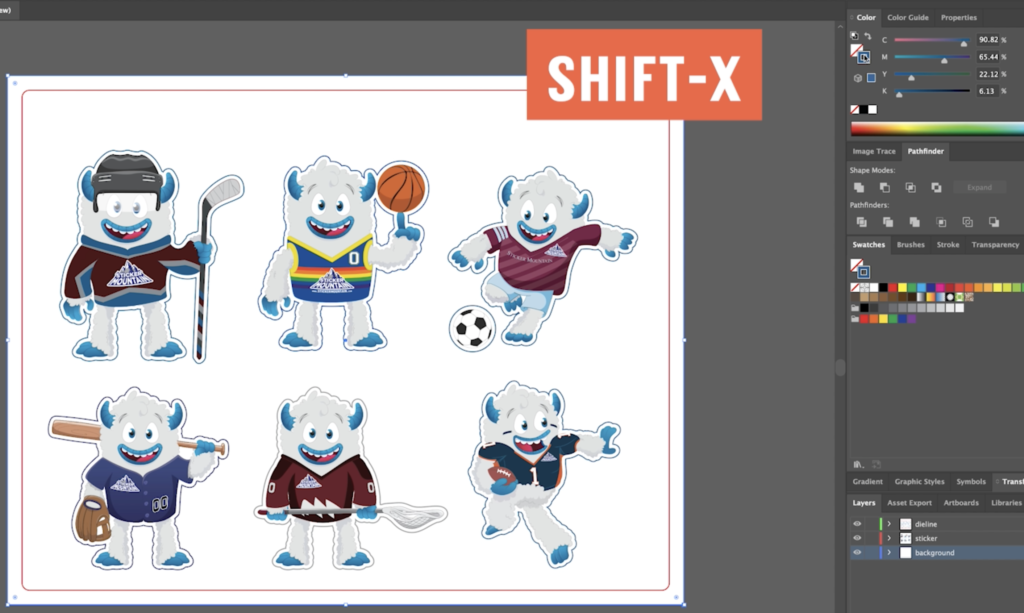
Finally, switch the fill and stroke in the Color Panel, or you can use the keyboard shortcut SHIFT+X.
BAM! You have your die-line for your first sticker!
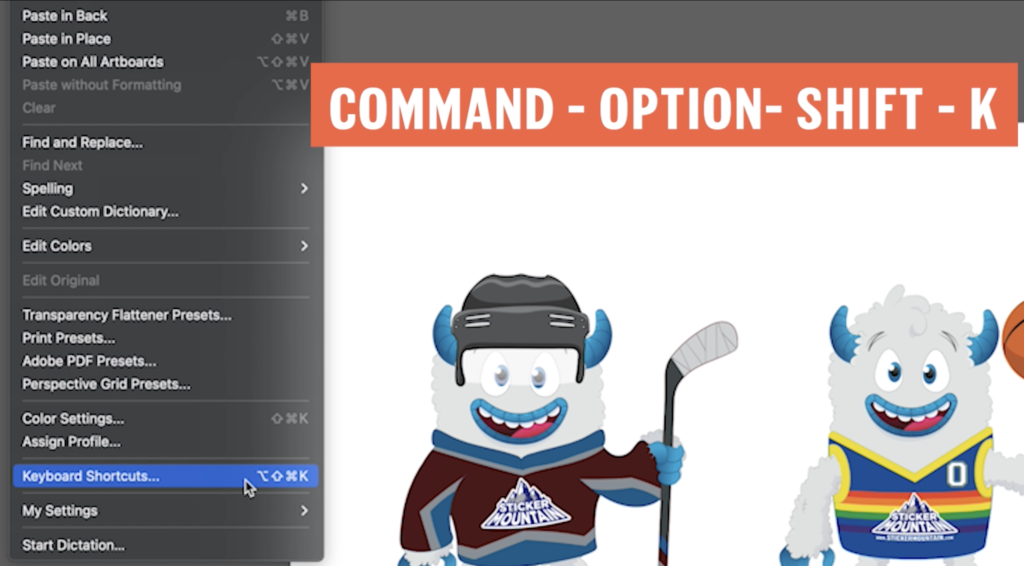
Bonus: How to Create a Shortcut in Adobe Illustrator
Also, to create a shortcut for the offset path action to make it faster:
Go to the Edit menu, select keyboard shortcuts (or COMMAND+ OPTION+SHIFT+K),
select menu commands, and search for offset path.
Select the empty square, and type the keyboard shortcut you want. In this case, it would be COMMAND+9.
Step Six: Create the Background
Now that we have outlines, it is time to create backgrounds.
In the background layer, create another rectangle the size of the artboard.
Since the stroke is still on, press SHIFT-X to swap the fill and stroke.
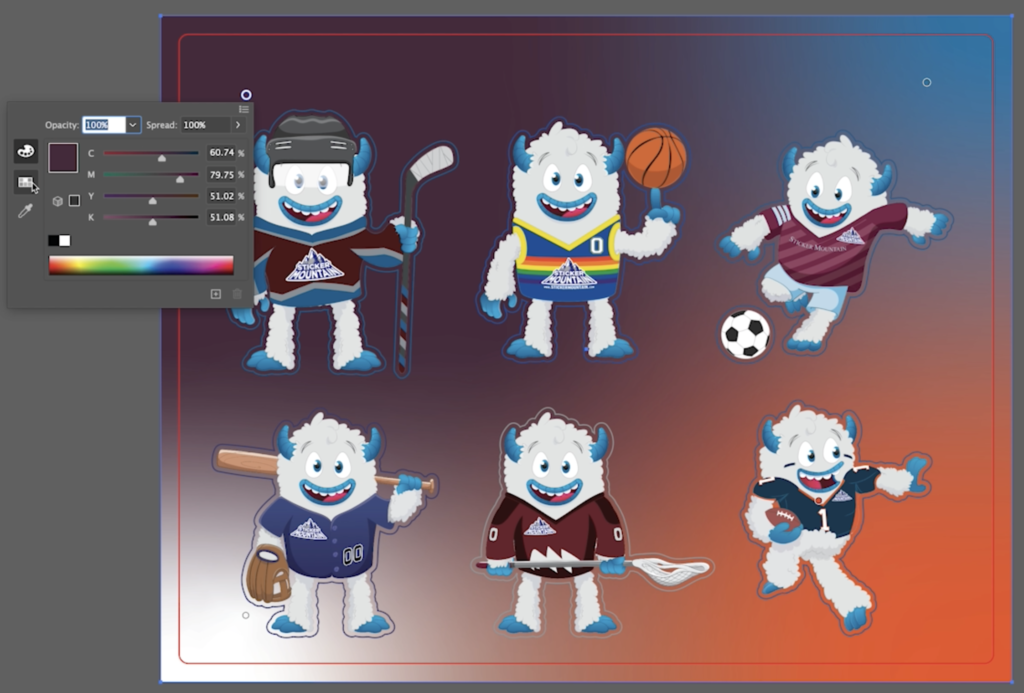
You can design your background however you like, but we will create a gradient background with a sports-themed pattern for this example.
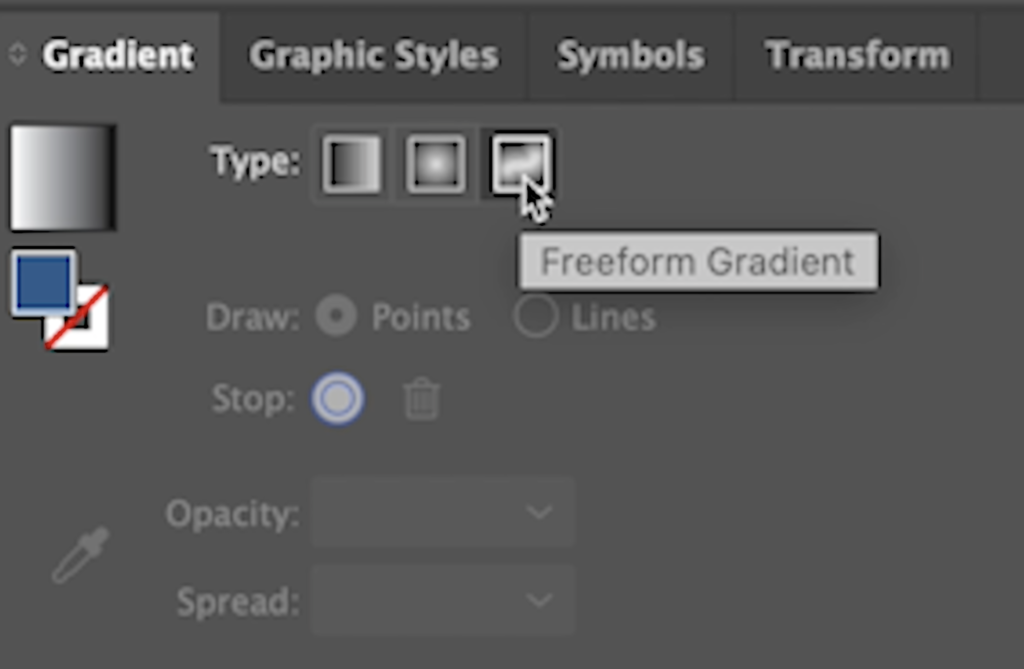
Create the Gradient
Go to Gradient Panel and select the Freeform option
Move the points around to create your desired color options.
If you want to change the point’s color, double-click on the circle in the middle of the point.
It can be changed through color, swatches, or through the eyedropper tool.
Move your points around until your desired look.
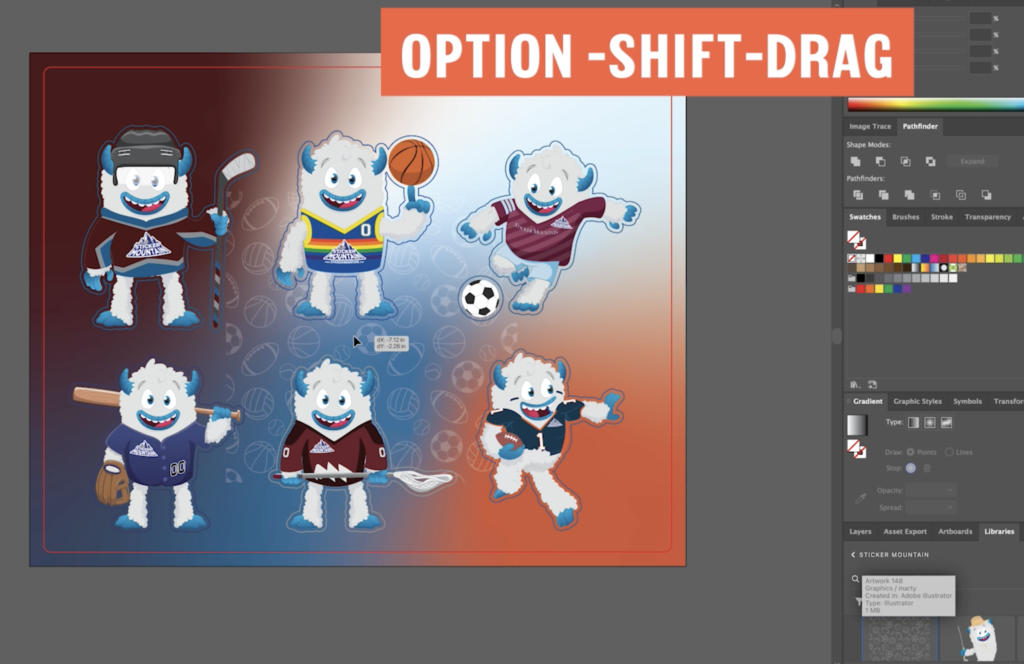
Place the Sports Pattern
Typically saved in libraries or wherever you save your patterns, click and drag that onto the board
Then, make copies by pressing the option and shift keys while dragging the copy until it fills the background.
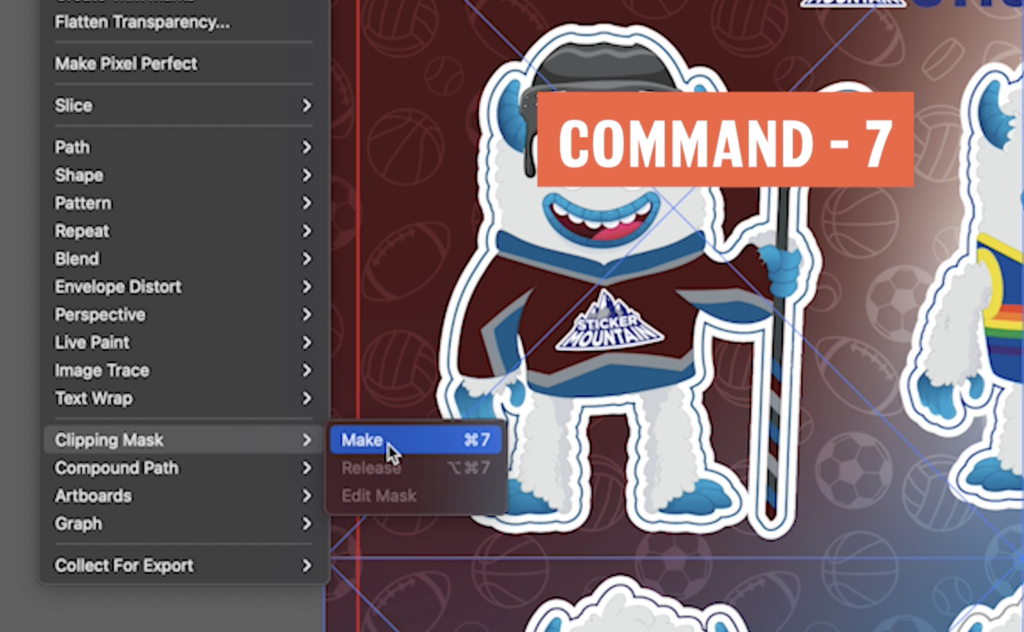
Next, lock the other layers, select all the patterns, and group them together by pressing COMMAND+G. Make sure the gradient rectangle is not selected.
With the rectangle and pattern chosen, create a clipping mask
Go to Object, then go down to Clipping Mask, click Make, or press COMMAND +7
Next, you can insert your title or Logo for the sticker page if you want or need one. For this example, we will put the Sticker Mountain logo at the top of our sheet.
Now you have a clean background.
Step Seven: Creating White Bleeds
Creating bleeds is crucial because we don’t want the background showing around your sticker. Bleeds will also allow the laser printer extra room to cut around your sticker.
First, create a copy of the die-line by pressing COMMAND-C, then COMMAND-F
Swap the stroke and fill with SHIFT-X then make the fill white
Next, Offset the Path using the same steps as in step five.
Press OK
Make sure everything is selected and click Unite in the Pathfinder Panel
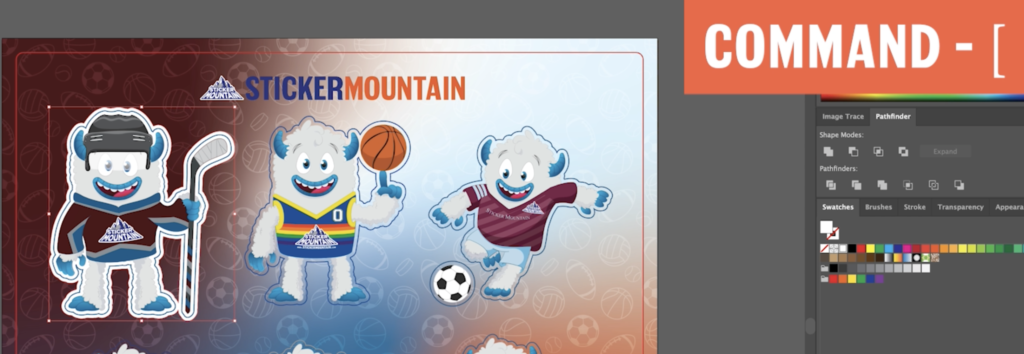
Select your silhouette, copy it with COMMAND-C, and paste it with COMMAND-F inside the sticker layer.
Then, use the shortcut COMMAND+[ to move to the back so you can see the sticker again.
Repeat for the rest of the stickers.
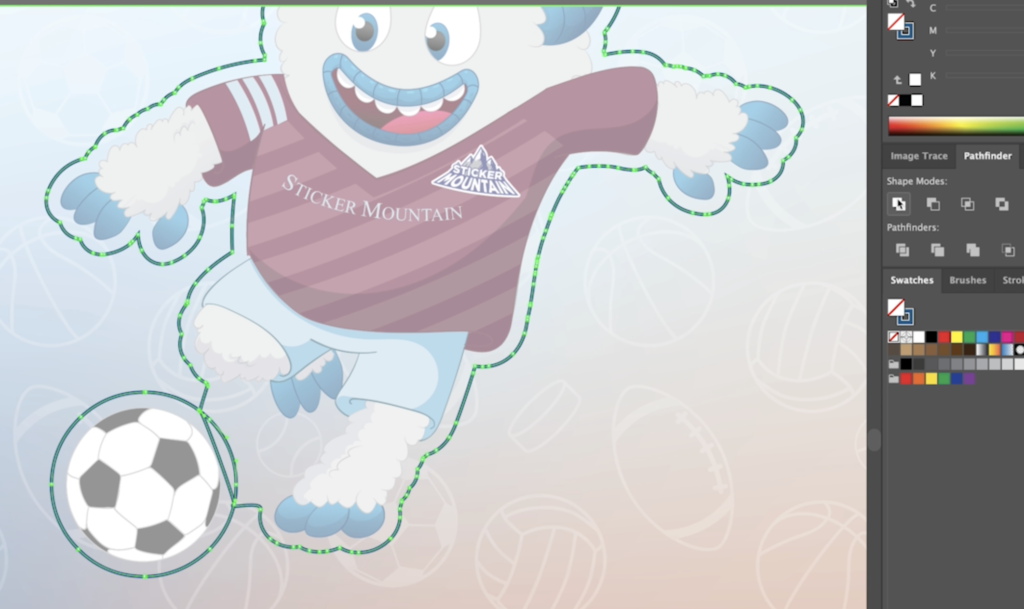
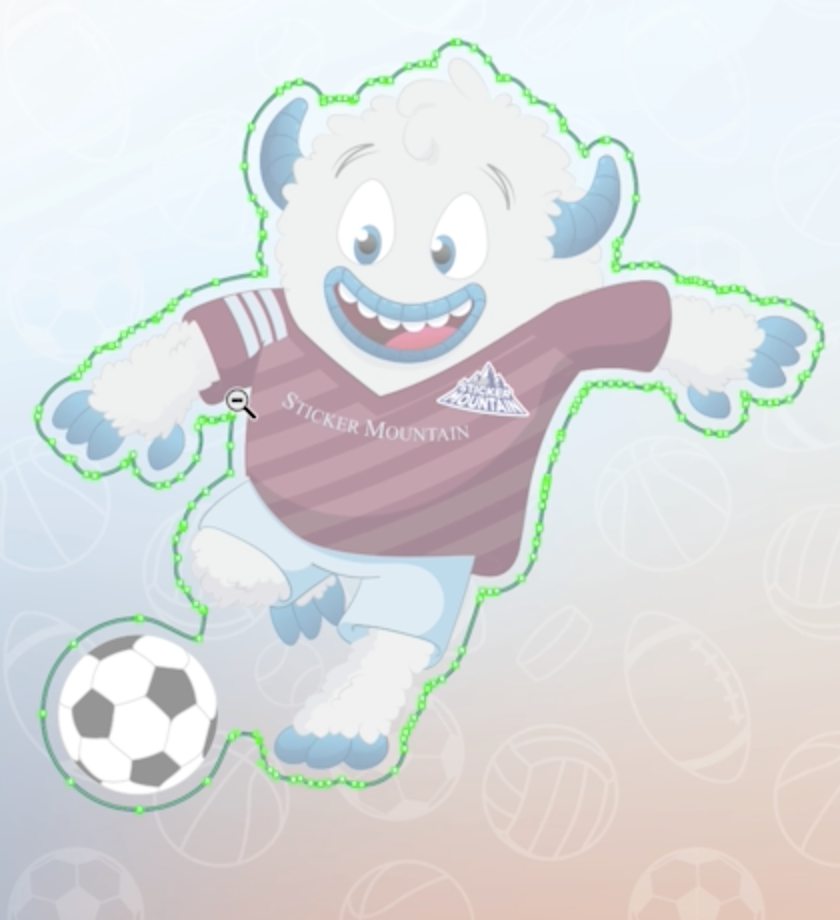
Bonus Tip: Redesigning Die Lines
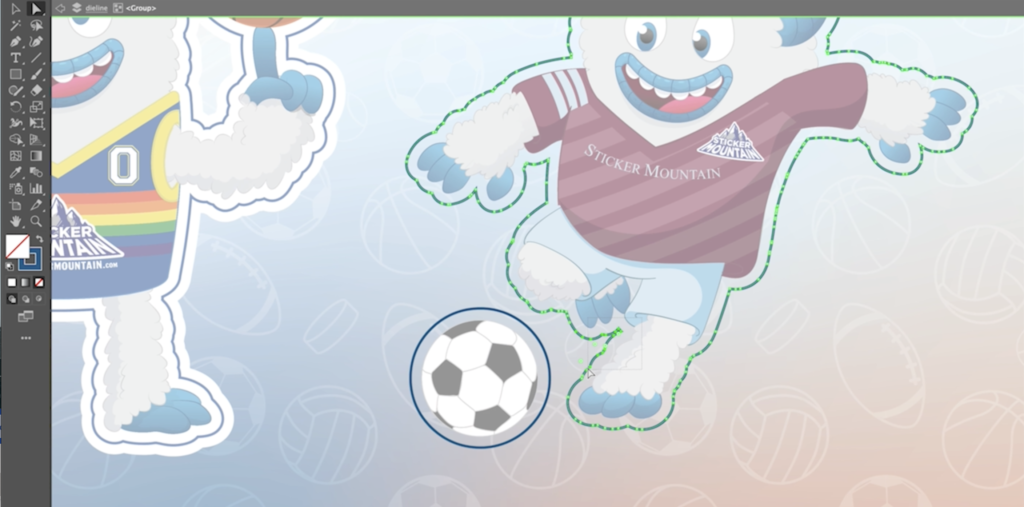
We are changing the die-line so the soccer ball is connected to Marty, making it one sticker, not two.
To begin, double-click the die-line to open isolation mode.
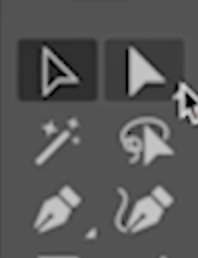
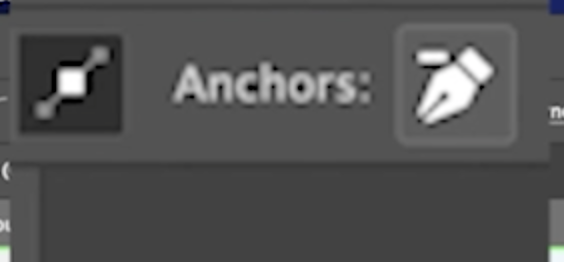
With the direct selection tool, drag a square over an area of anchor points you don’t want.
Then press the minus pen button at the top.
To avoid making the lines look odd, keep moving anchor points until there is a straight line.
Once you have your anchor points, drag them to overlap the soccer ball.
Select both outlines, go back to Pathfinder, and Unite them.
If your points need to be cleaned up, do so now.
Now back to the rest of the stickers!
Step 8: You're done!
Your Custom Stickers Sheets are now ready to be printed!
Now that your custom sticker sheet is complete, it is time to upload your artwork to Sticker Mountain. You will have your stickers in the blink of an eye with how fast Sticker Mountain’s turnaround time is. If you want to watch a video with this tutorial, you can watch down below! For any questions, please call our top-of-the-line customer service team or visit our FAQ page!
Don’t forget to explore our variety of Embellished Labels, including our stunning foil label printing, eye-catching spot UV, and luxurious soft-touch matte lamination, to make your stickers truly stand out. Also, check out Sticker Mountain’s custom-printed industry labels and stickers for beer labels, wine labels, labels for food containers, and more. Upload your artwork today and experience the Sticker Mountain difference. Upload your artwork today and experience the Sticker Mountain difference!
Random Fact of the Day
Did you know the Rockies currently hold the MLB record for season attendance? Before Coors Field was built, the Rockies played their first two seasons at Mile High Stadium. They set the record during their inaugural season in 1993 when 4,483,350 fans attended.